GIS Web Mapping Application Quick Guide

Learn about City of Bryan GIS application interface features and get the most out of our maps. Click the image below to see an overview of the whole interface, or click through the tabs to learn about specific sections of the application.

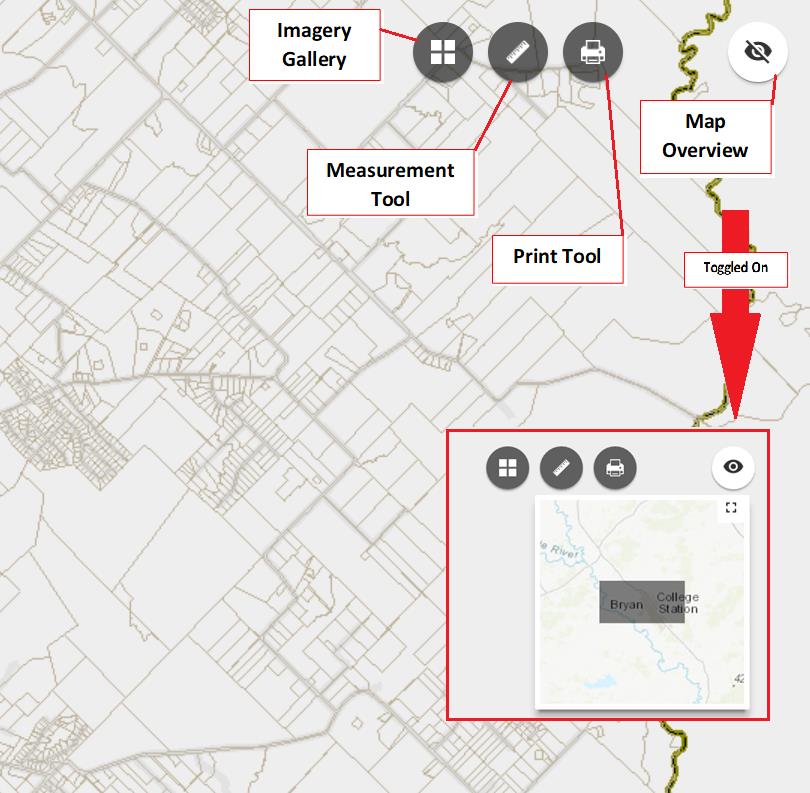
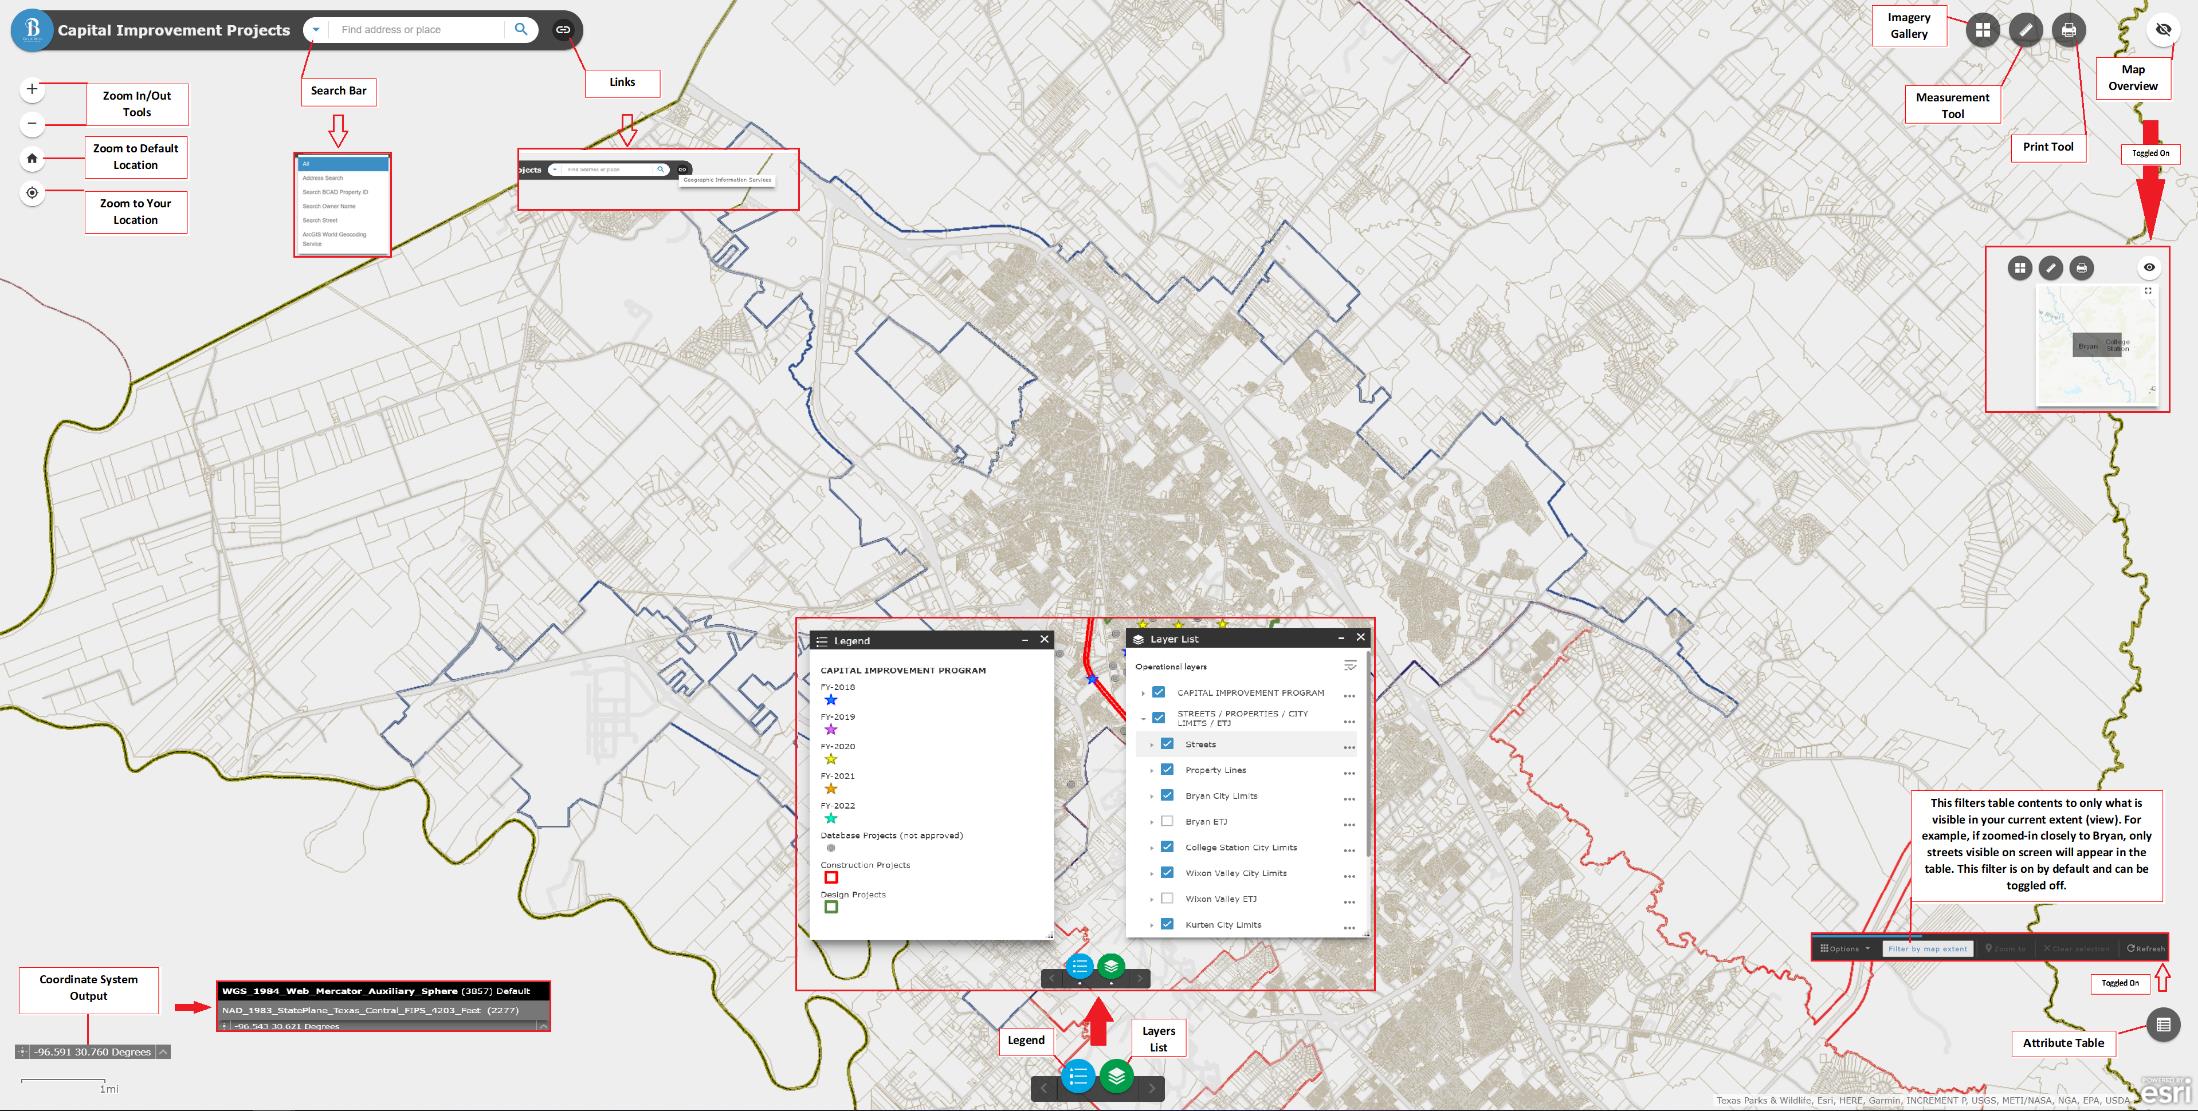
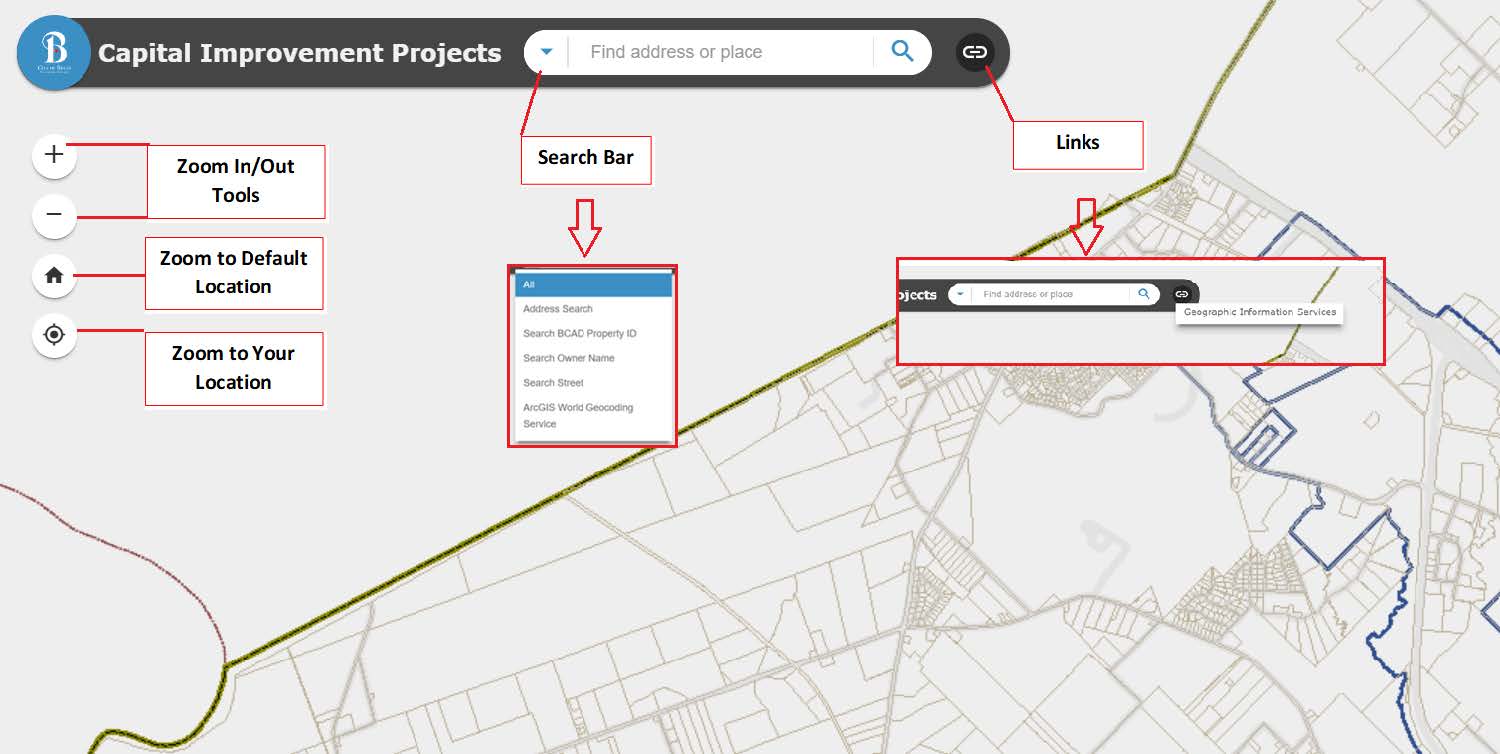
The top left corner of the interface includes zoom tools, the search bar and a link to the GIS Mapping Services webpage.

  • Zoom In/Out Tools: Zoom in or out on the current view of the map.
  • Zoom to Default Location: This button resets the view to see the entire city.
  • Zoom to Your Location: If your browser is set to share location, this button will zoom the map to your current location.
  • Search Bar: Type a simple address or place into the search bar to find it. Or, click the drop down arrow on the left side of the search bar to select a different search criteria: users can search by BCAD property ID, BCAD owner name, street name or full address.
  • Links: The links button on the right side of the search bar provides a link to the GIS Mapping Services webpage.
A screenshot of the top left corner of the interface. The instructions are written out in this tab.

(click the image to view a stand-alone version)

The top right corner of the interface includes imagery, measurement, print and map overview tools.

  • Imagery Gallery: Select from various satellite overlay views.
  • Measurement Tool: This tool offers area, distance and degree calculations.
  • Print Tool: Print the current map view.
  • Map Overview: The eyeball icon in the top right corner toggles the Map Overview feature, which displays a bigger-picture, contextual version of the current map view.
A screenshot of the top right corner of the interface. The instructions are written out in this tab.

(click the image to view a stand-alone version)

The bottom right corner of the interface features an attribute table button.

  • Attribute Table Button: Clicking this button toggles a table view of all current map attributes. The "Filter by Map Extent" option is selected by default and will filter table contents to only what is visible in the current view. For example, if zoomed in closely to Bryan, only the streets visible on screen will appear in the table. While this option is selected by default, it can be toggled off.
A screenshot of the bottom right corner of the interface. The instructions are written out in this tab.

(click the image to view a stand-alone version)

The bottom edge of the interface includes the Legend and Layers icons. When toggled on, a white dot appears below the icon.

  • Legends: Toggles on a map legend.
  • Layers: Toggles a selectable list of map layers.
A screenshot of the bottom edge of the interface. The instructions are written out in this tab.

(click the image to view a stand-alone version)

A screenshot of the bottom left corner of the interface. The instructions are written out in this tab.

The bottom left corner of the interface includes coordinate system information.

  • Coordinate System Output: The middle bar displays the output of the currently selected coordinate system.
  • Right Arrow: By clicking the arrow to the right of the output box, users can toggle between WGS 1984 and NAD 1983.
  • Left Symbol: By clicking the symbol to the left of the output box, users can enable clicking the map to get coordinates. With this, users can add a point to the map and copy the coordinates.
A screenshot of the bottom left corner of the interface. The instructions are written out in this tab.

(click the image to view a stand-alone version)

The share widget of the interface is a round icon with a point and three arrows going out of it. The color may vary for each mapping application.

  • Share Capabilities: The share widget allows users to share the application by sending an email with a link, posting to a social media account or embedding in a website or blog. 
    • Select "Link Options" to choose from additional parameters:
      • Current map extent: This is the default option and allows users to share only the current view.
      • Click the map to define the center of the map with zoom level: This option allows users to choose a center point for the map to be focused on. When selected, a pinpoint icon displays under the option. Click the icon, then click on the map where you want the map to center.
      • Click the map to define the center of the map with map scale: This option allows users to automatically update the link based on map scale. When selected, a pinpoint icon displays under the option. Click the icon, then click on the map where you want the map to center.
      • Find the location or feature and zoom to it: Input a location in the box, or a feature in a searchable layer. When the link from this option is opened, it will select and zoom to the defined location.
      • Query a feature and zoom to it: Choose a layer, a field and a value from the drop-down menus to query a feature and zoom to it.
      • Add a marker on the map: Click the pinpoint icon and click where you want to add a marker in the map. Fill in the coordinate system’s Well-Known ID (WKID), Pop-up title, Symbol and Label properties in each text box.
      • Overwrite default screen size of mobile layout: Input the screen size in pixels. By default, when either the height or width of a screen display is less than 600 pixels, the mobile layout automatically applies.
      • Set display language of the app
A screenshot of the share section of the interface. The instructions are written out in this tab.

(click the image to view a stand-alone version)

Contact Us

Email us through our contact form.